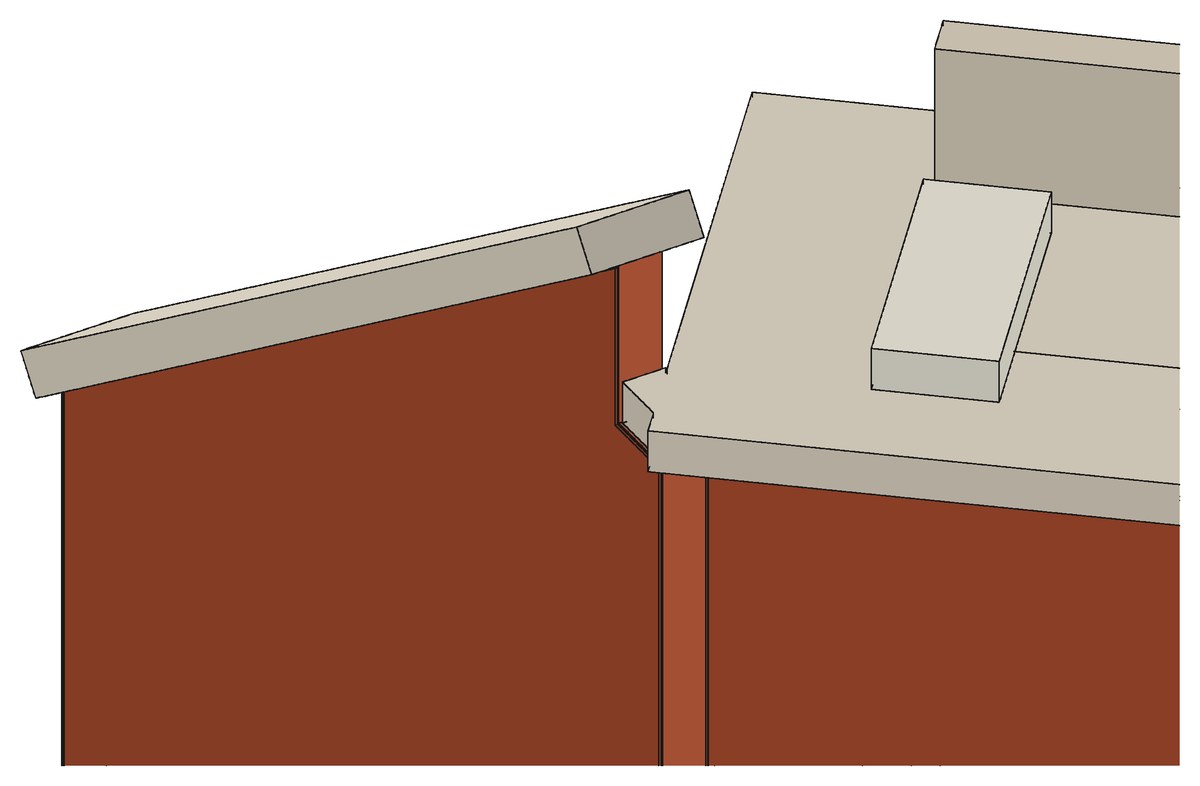
Single-Track Girder Bridge
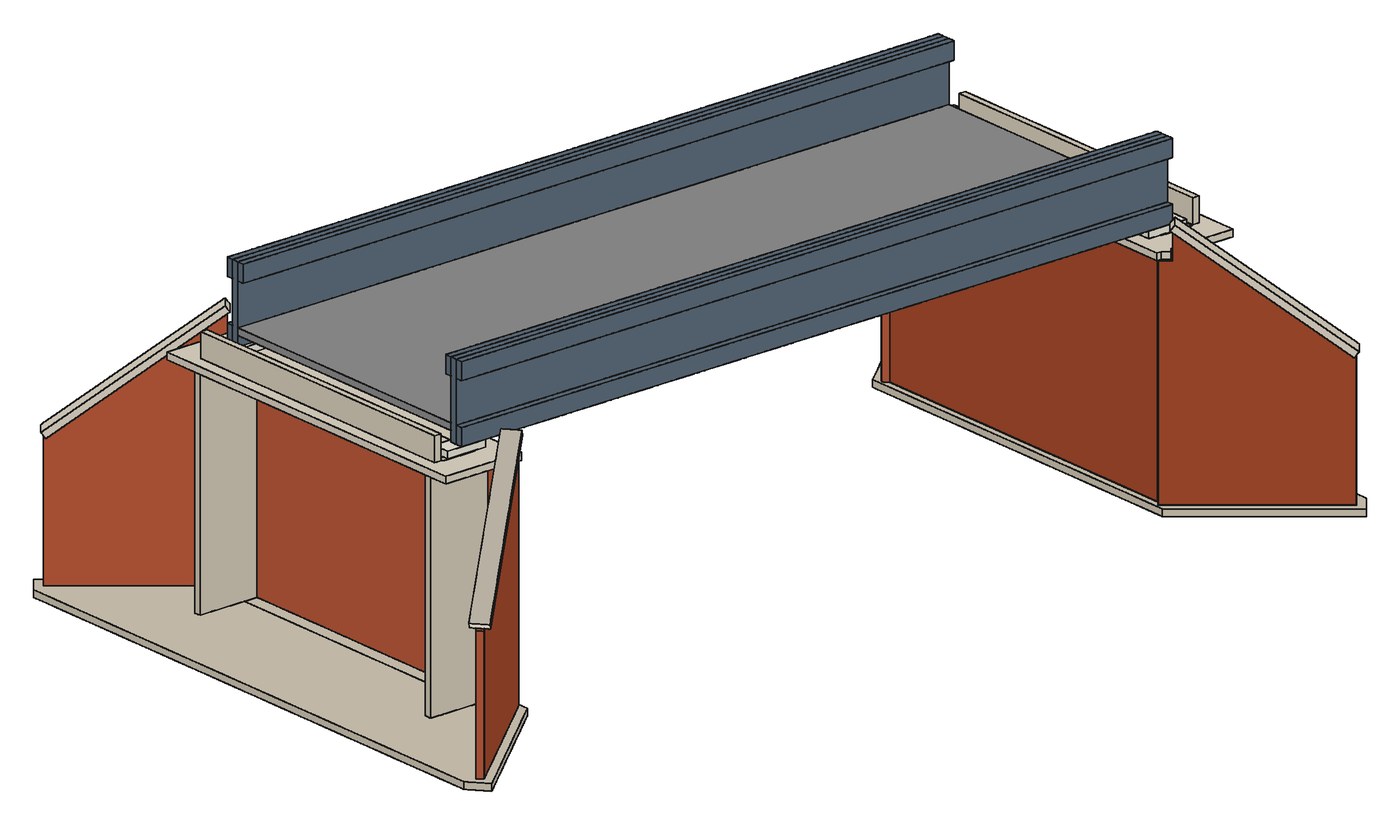
A half-through riveted plate girder span on two brick abutments with splayed wingwalls, for a single track over a road or stream.
- Scale
- TT120 (1:120)
- Footprint (assembled)
- 142 × 86 mm, 46 mm high
- Span
- 112 mm girders, 100 mm between abutments
- Headroom
- 35 mm (13′9″ at 1:120)
- Laser-cut parts
- 41 on 2 sheets (incl. 2 jig bars)
- Material
- 1 mm MDF
- Skill level
- TBC
Instructions version v1.0 · matches box revision A Placeholder
What's in the box
- 2 laser-cut 1 mm MDF sheets with 41 labelled parts, engraved brick, stone joints and rivets
- 2 abutments with splayed wingwalls, copings and bed stones
- Girder span: 2 riveted webs, 6 flange strips, deck and 6 cross ribs
- 2 rib spacer jig bars (a tool, not glued in)
- Box label with QR code to this page
Tools & glue you'll need
- A glue suitable for MDF (PVA, wood glue or a laser-cut kit glue)
- A sharp craft knife
- A cutting mat
- Helpful extras (we find these help): a No.11 blade, fine tweezers, small clamps or pegs, a sanding stick and a small square
Instructions
Build it step by step
Older versions
None yet. When the kit changes, earlier PDFs stay listed here with the box revision they match.A short summary of the 11 steps. The PDF has the full step-by-step pictures and the parts map.
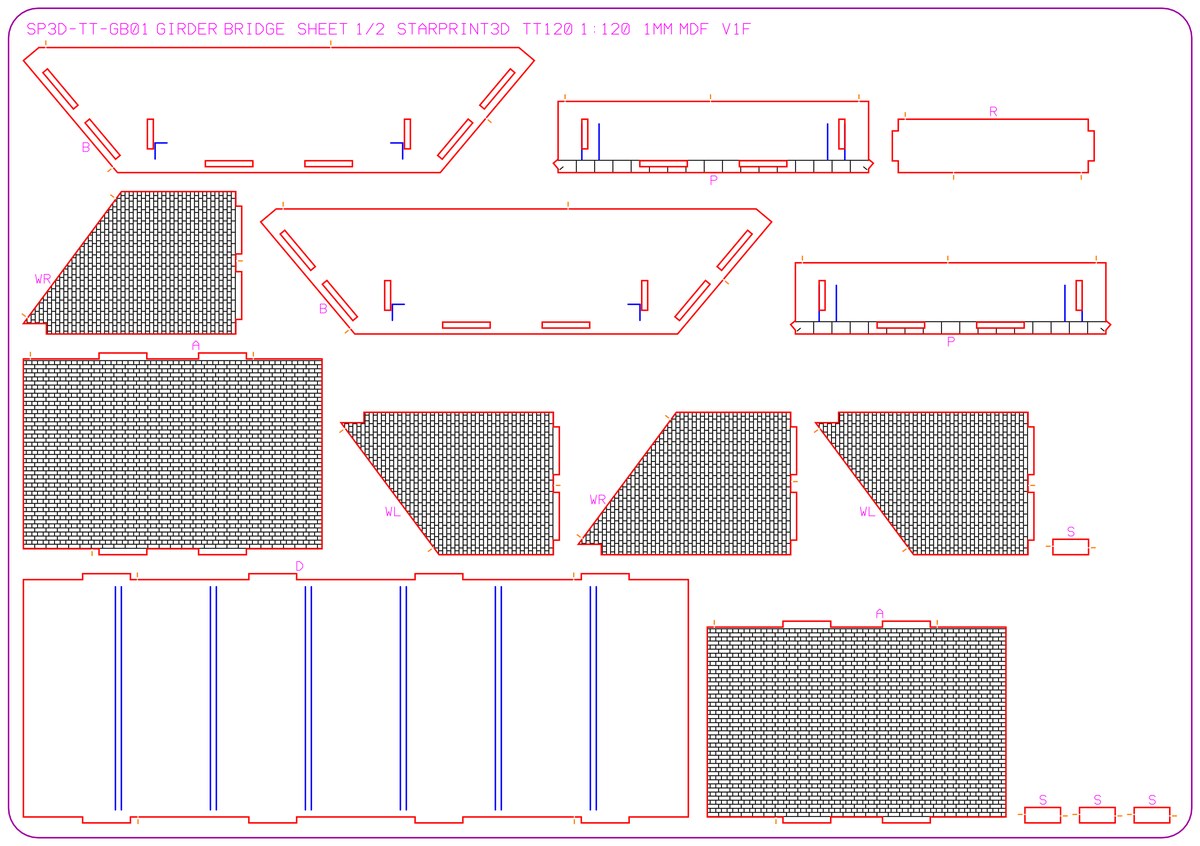
Check the parts
Check the two sheets against the parts map on page 3 of the PDF. Identical parts share one engraved label (4 × R means four identical brace ribs). Only the wingwalls come as a left (WL) and a right (WR).
Cut through each tiny holding tab with a sharp knife from the top face. Don't push parts out, because the thin strips snap.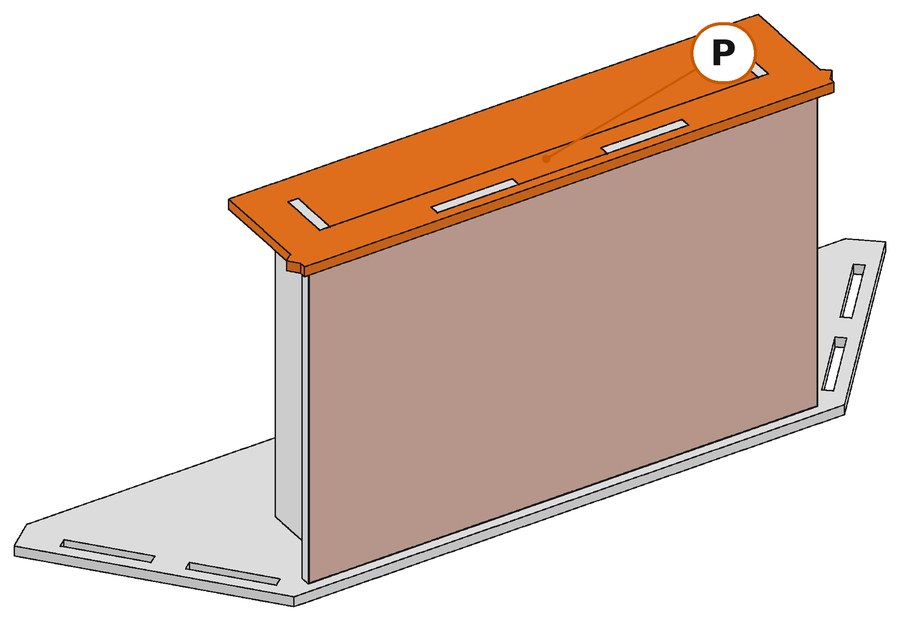
Dry-fit the abutment core
Base plate B, brick face A, two brace ribs R and shelf plate P. Leave the wingwalls off for now.
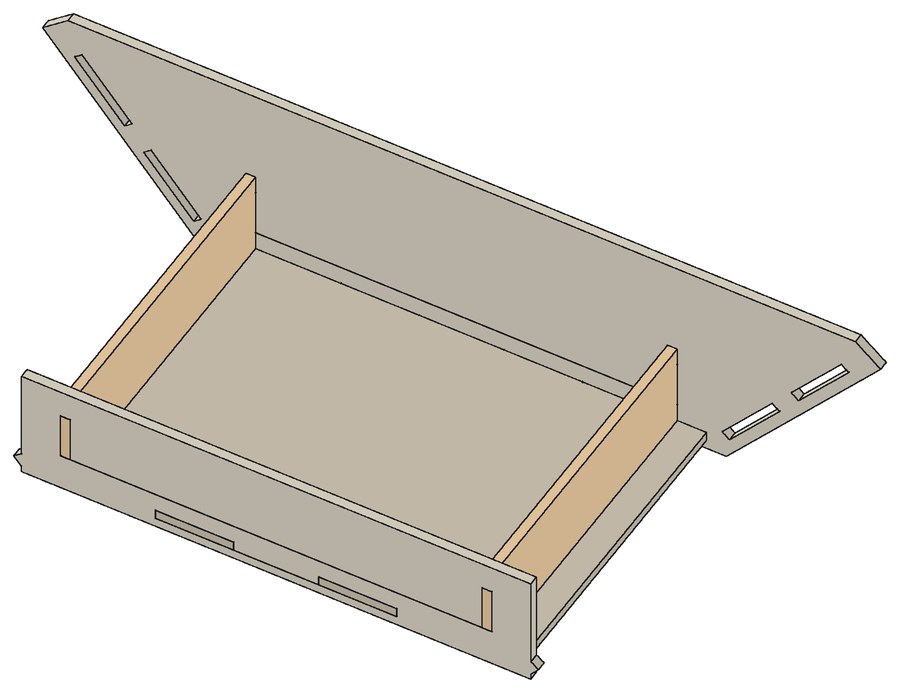
Glue the five parts and let them cure
Lay the core on its brick face, glue every inside joint from the open back and leave it flat until the glue has cured.
Don't try to dry-fit the wingwalls with everything else first. There aren't enough hands, and it falls apart.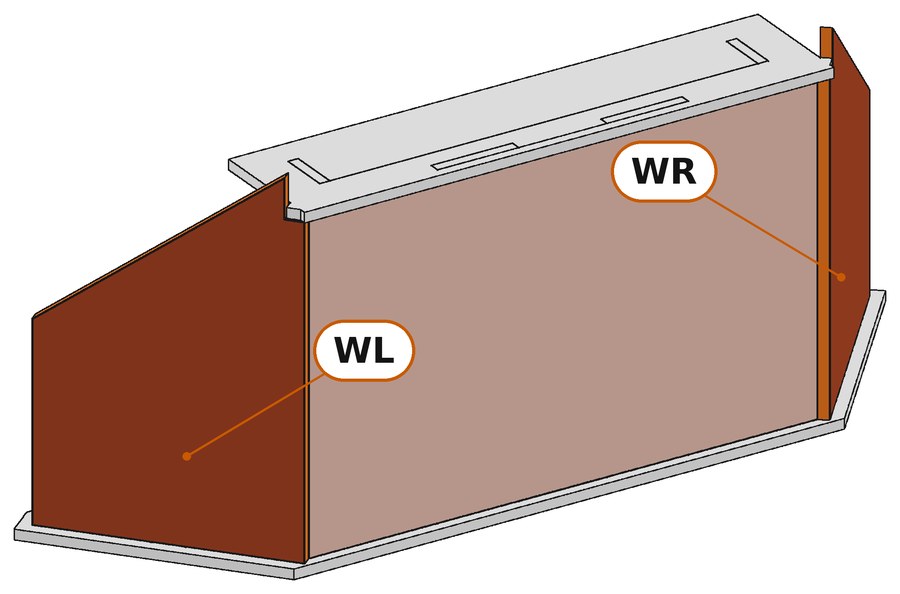
Slip on the wingwalls, then the copings and bed stones
Tuck the small step at the top of each wingwall under the pointed end of P, press the tabs into B and glue. Then add the copings K, bed stones S and ballast strip U. Build the second abutment the same way.
Build the span and fit the cross ribs
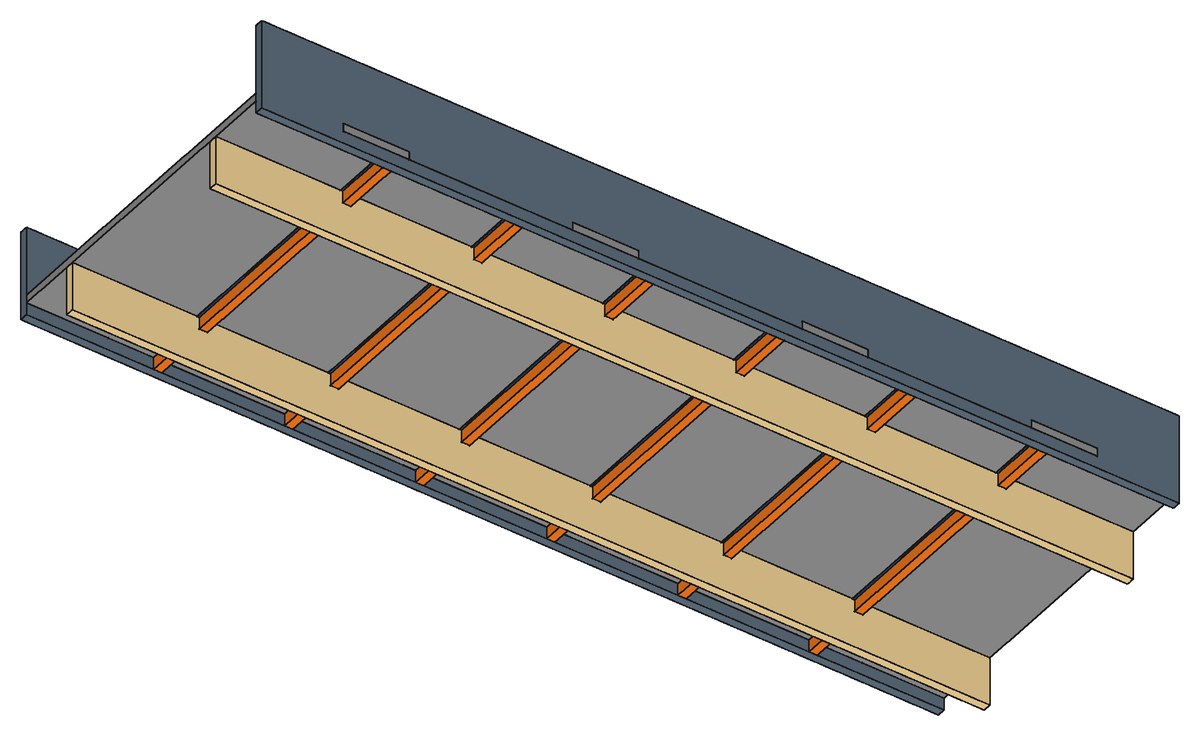
Push the deck into the two girder webs ENGRAVED SIDE DOWN. Turn the span over, glue the six cross ribs X between the engraved line pairs, and hold them upright with the two jig bars J. Lift the jigs off after about ten minutes.
The jig bars are a tool, not part of the model. Keep glue away from the slots.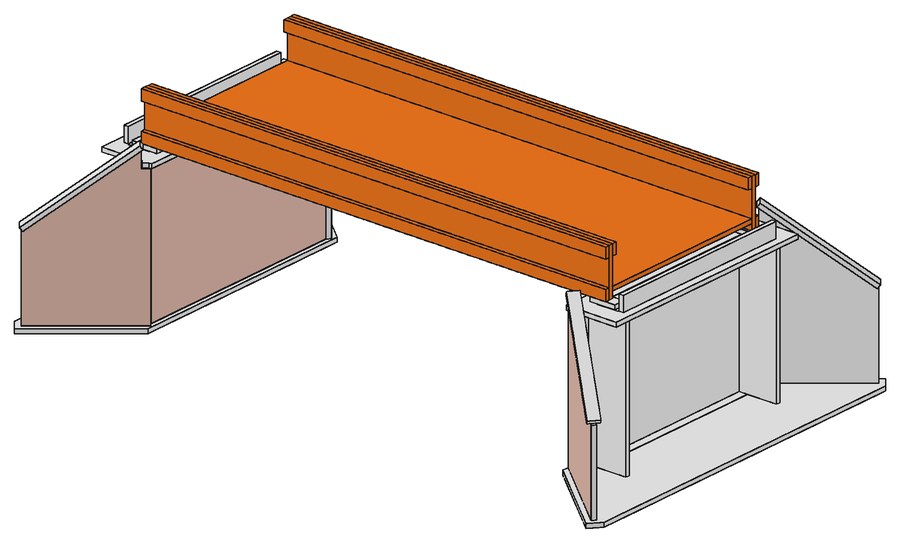
Flanges, then set the span
Add the six flange strips FL, stand the abutments 100 mm apart and lower the span onto the bed stones.
Painting
Painting guide
- Seal first. Brush thinned PVA or sanding sealer on the cut edges, then prime with a spray primer.
- Brick: base coat in a brick red, pick out odd bricks lighter and darker, then work a mortar colour into the joints and wipe the faces clean.
- Stone (copings, shelf front, bed stones): buff or light grey, dry-brushed lighter, with a dark wash in the joints.
- Girders: a railway steel colour. Dry-brush the rivet rows lightly and add rust streaks below the bearings.
- Track: centre it between the girders (20 mm from each web) and ballast up to the end strips.
Full painting guide → Colour refs for this kit TBC
Tips & FAQ
Common questions
The abutment keeps falling apart when I dry-fit it.
Build it in two stages. Glue the first five parts (B, A, two R and P) and let them cure, then slip on the wingwalls. The whole abutment won't hold together dry.
Which way up does the deck go?
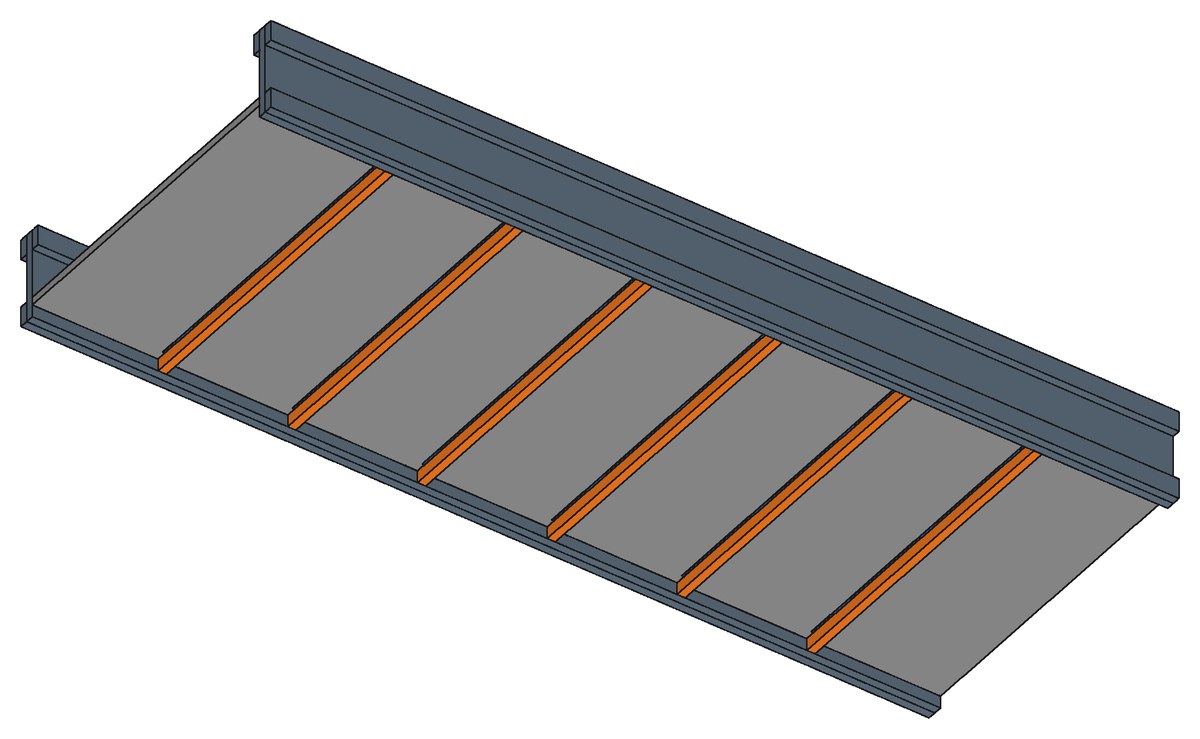
Engraved side down. The engraved line pairs end up underneath and show you where the six cross ribs go.
What are the two long slotted bars?
Rib spacer jigs. They hold the cross ribs upright and evenly spaced while the glue grabs, then they lift off. Keep them for your next kit.
Can I make the abutments stiffer?
If you like, glue a piece of 3 mm MDF, ply or thick card (41.5 × 31.8 mm) behind each brick face. It's optional and not supplied, and the bridge doesn't need it.
I'm missing a part or one is damaged.
Message us through Etsy with your kit code and the part label (e.g. X), and we'll send a replacement. Policy to confirm
Haven't got one yet?